It has been a while since I posted
anything from my shop activities. I've wanted to build another shave
horse for quite some time and have been looking around for just the
right plans / idea. Part of what I was after was a dumb head style as
I have and use the Brian Boggs style “mule".
 |
| Brian Boggs style mule |
When doing long chair parts it is a
little annoying to have to thread the part through the head to turn
it around or go end to end. Surly not the end of the world or a
great hold up as there is only one bow or one arm per chair. Just
wanted to try a different style. The other reason is that I can now make
multiple heads and try out Peter Galbert's ratchet head. I also
want to design and make a spoon carving / plier type head all using
the same base platform. I love carving spoons on the shave horse.
The draw knife is an amazing tool. Faster than a hatchet with more
control and accuracy. My other goal was to make a very simple horse
from readily available construction type materials. 2x4's 2x8's I
chose to follow Tim Manney's plan and I veered off in only a few
places.
 |
| full side view |
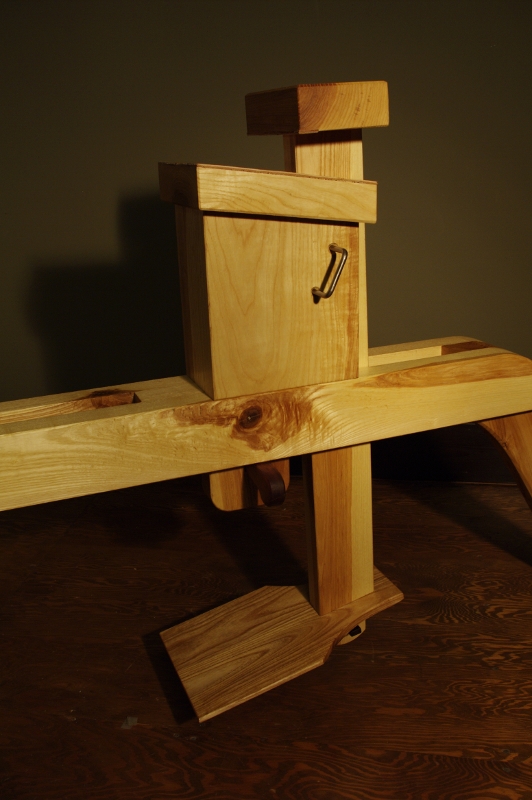
 |
| treadle from underneath |
I am not sure what it is, but I just
can't seem to keep it simple. Posted in my shop I have a little
shaker quote that reads
Don't
make something unless it is both necessary and useful;
but
if it is both necessary and useful,
don't
hesitate to make it beautiful.
-Shaker
Dictum-
With that I
dressed it up in a few places. First I used ash from my woods
instead of southern yellow pine.
 |
| right side |
 |
| components |
Then I added a
few curves to lighten things up in terms of the angular lines.
 |
| Rear view |
And I had to
take Tim's advise and carve a quick seat. He is right- it is very
comfortable. Anyone recognize the “perch” pattern?
 |
| Seat |
One of the
things that drew me to Tim's plan was he had done such a nice job of
laying out his process and plans seemed clear. I made some quick
drawings and dimensions with a list of the parts and off to the shop
I went …..you can't believe how many times I came back to his blog
and studied his posts to get some little detail that I had missed.
He has done an incredible job of laying out the process and giving
all the needed dimensions, but there is just more than meets the eye
at first blush.
 |
| Rear leg attachment |
Tim suggested
that you use hard wood for the tapered draw pins......well I have
been hording this rose wood for years and I have ten of these 2x2's
60” long, do you think I could spare 6” for this project. It was
about time. Not often that I use Rosewood and what a pleasure to
plane and scrape. I chose to use a single 1/2 inch bolt to secure the rear legs.
 |
| Users view |
I used some
leather for the champs (faces of the vise) and was so pleased that I
added some to the Boggs mule I built a few years ago. Nice up-grade.
Now with two horses I can have one at my shop in town and one at
home and never want for the other.
 |
| Head and view of pin |
As
for a finial assessment, The pin type adjustment will take some
getting used to but works quite well. Some sort of stop for the pin
would be nice, just can't figure out a simple answer. Tim mentions
that he is short so one should make sure the height of the platform
and the height of the horse off the ground are right for your own
size body. I found his dimensions very close to what I like and
comfortable. My trestle is 18 “ above the floor and my platform at
its front edge is 10 1/2“above the trestle. The Boggs mule is only 57 "
long and Tim's is 64". Both are perfect Tim's just takes up a
little bigger foot print.